Posts

CAN Control of inVIEW

Three Ways to Control inVIEW From Your Infinitybox System

The inVIEW Wiper Control Module is a full member of the Infinitybox ecosystem. When it’s part of your system, inVIEW receives its commands over the Infinitybox CAN network — the same network that ties the rest of your Infinitybox components together. That means you can operate your wipers from any of the control interfaces in your system, and it all works over a single pair of network wires.

To get inVIEW talking on the network, you’ll connect CAN HI and CAN LO to the Infinitybox CAN bus. Be sure to follow the instructions in your inVIEW manual to make these connections correctly. Once inVIEW is on the network, you have three different ways to control it.

Control With Switches Wired to Your MASTERCELL

If you’re running physical switches in your build, you can wire them to the inputs on your MASTERCELL and use them to operate inVIEW. This lets you keep the tactile feel of real switches — whether that’s a factory stalk, billet buttons, or toggles on a custom panel — while inVIEW handles all the wiper logic behind the scenes. Because your switches only need to trigger a MASTERCELL input, you can leave the big, clunky factory wiper control switches behind and use whatever clean, compact switch fits your build.

You can assign your MASTERCELL inputs to any of the inVIEW functions, including low, high, intermittent and washer.

To assign your MASTERCELL inputs to the inVIEW functions, reference the inCODE NGX instructions. inCODE NGX walks you through mapping each input to the wiper function you want it to control.

Control From the inTOUCH Screens on inLINK NGX

If your system includes inLINK NGX, you can control inVIEW directly from the inTOUCH screens. The Wiper Control screen puts every function right at your fingertips on the display. And because inTOUCH runs over your inLINK network, you can pull it up on any smartphone, tablet, or other WiFi-enabled touchscreen that connects to inLINK — giving you wiper control from whatever device is already in your hand.
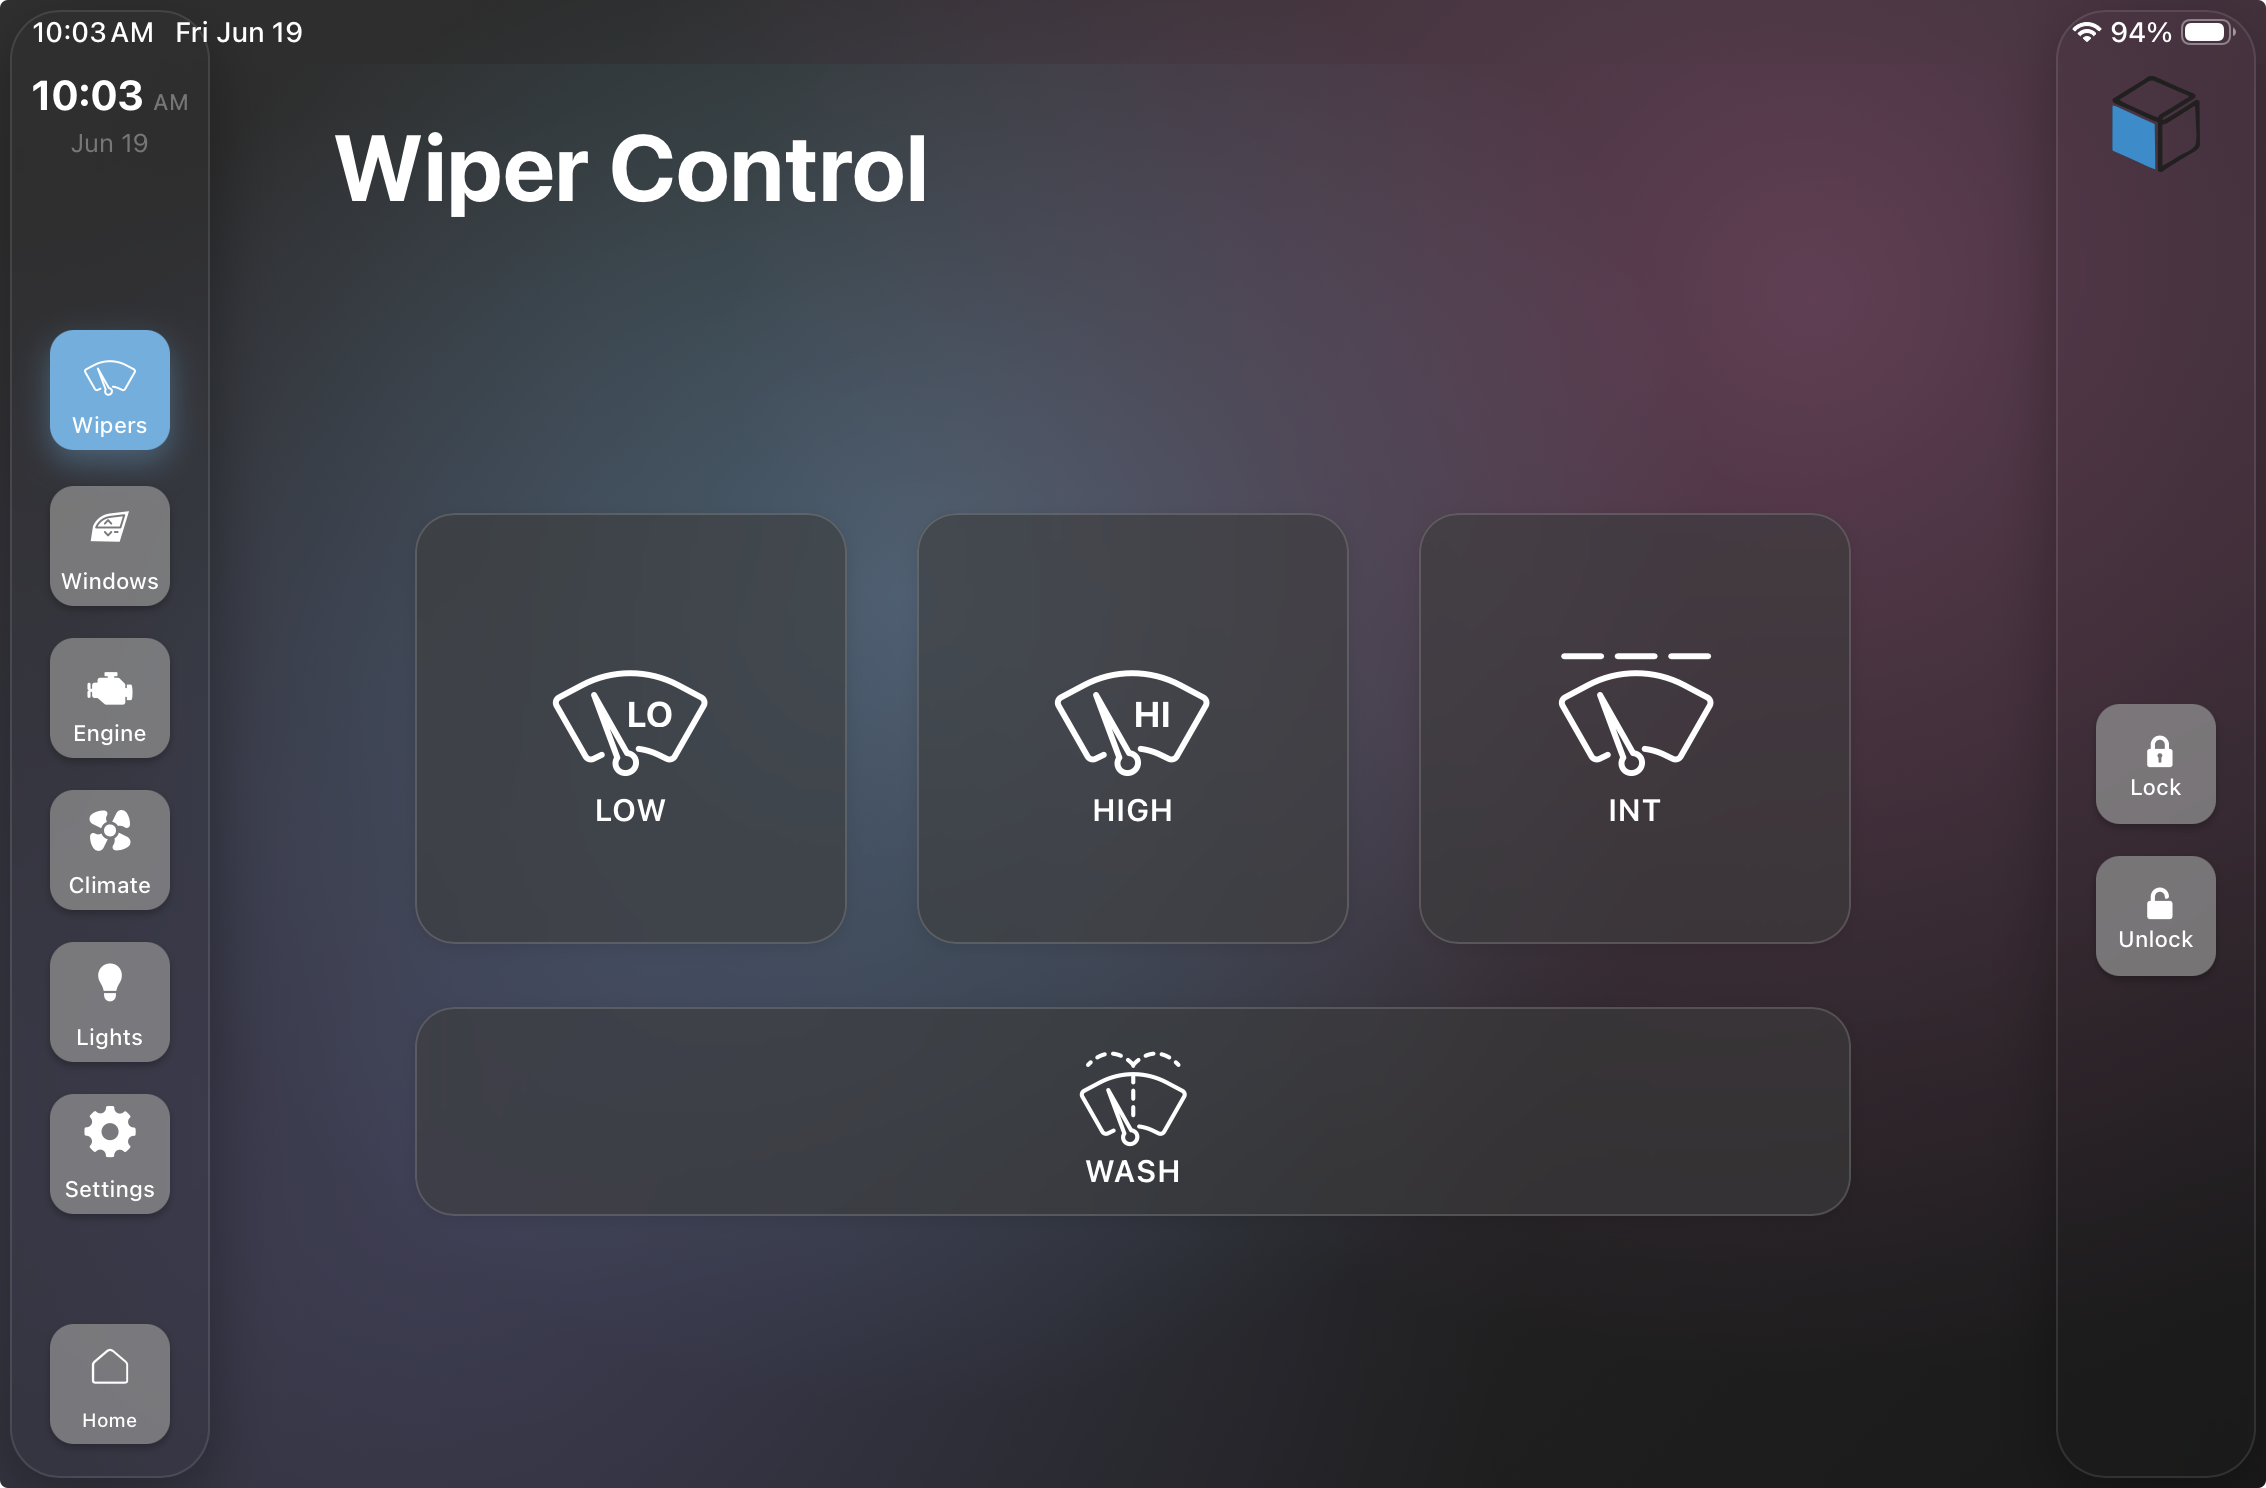
inTOUCH Wiper Control screen on an inLINK NGX system displayed on an iPad, showing Low, High and INT buttons in a row with a wide Wash button below, and navigation buttons along the left for other vehicle functions.

inVIEW wiper control through the inTOUCH screen on inLINK NGX

From this screen you get low, high and intermittent wiper speeds, along with a wide Wash button for the washer pump. Navigation along the side takes you to the rest of your inTOUCH functions, so wiper control lives right alongside everything else in your system — no extra switches required.

Control From the inCONTROL

The inCONTROL gives you another clean, switch-free way to operate inVIEW. Start from the home screen and rotate the ring to highlight the wiper function, then touch the screen to open it.
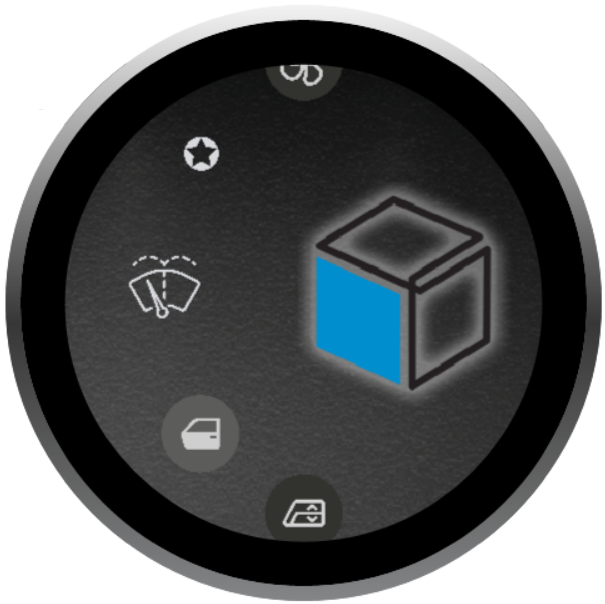
Infinitybox inCONTROL round display showing function icons arranged in an arc on the left with the wiper icon highlighted, and the Infinitybox cube logo on the right.

Selecting wiper control on the Infinitybox inCONTROL

That brings you to the inVIEW wiper control screen, where low, high, intermittent and washer are arranged around the display. A yellow arc around each function shows you whether it’s on or off, and touching a function turns it on or off.
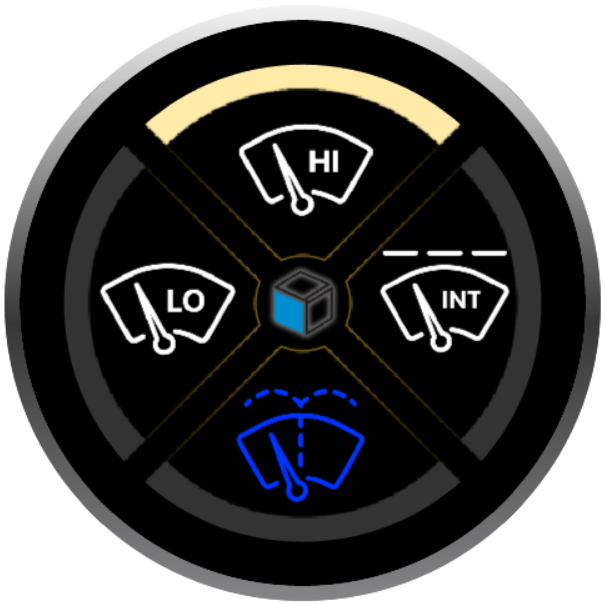
Infinitybox inCONTROL wiper control screen with HI, INT, WASH and LO functions arranged as four pie sections at the 12:00, 3:00, 6:00 and 9:00 positions, each with a yellow arc indicating whether that function is on or off.

The inVIEW wiper control screen on the Infinitybox inCONTROL

One Module, Your Choice of Controls

However you like to interact with your vehicle — real switches through your MASTERCELL, the inTOUCH screens on inLINK NGX, or the inCONTROL — inVIEW responds to all of them over the Infinitybox CAN network. That’s the advantage of building with Infinitybox: one wiper module, controlled however fits your build.

For the wiring details specific to your wiper motor, see the manual for your version:
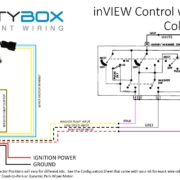
Wiring diagram showing the 1983–1987 GM G-Body steering column wiper switch connected to a standalone inVIEW Wiper Control Module, with factory switch wire colors mapped to inVIEW inputs plus ground, ignition power, washer pump, and a generic wiper motor connection.

inVIEW Standalone: Wiring the 1983–1987 G-Body Wiper Stalk

1970 Mustang Infinitybox Wiring

Here’s another great example of a customer car wired with our Infinitybox system.  Paul L. wired this beautiful 1970 Mustang with our 20-Circuit KitinLINK and inMOTION.  Paul just sent us pictures showing off the finished car and how he installed his Infinitybox system.

This picture shows the center console of his car.  You can see the MASTERCELL and the inMOTION cell located in the frame of the center console.  The MASTERCELL connects to all of his switches.  The inMOTION cell controls the motion of his power windows and door locks.

MASTERCELL and inMOTION cell in a 1970 Mustang wired with the Infinitybox system

MASTERCELL and inMOTION cell in a 1970 Mustang wired with the Infinitybox system

You can see in this picture how seamlessly these cells disappear into the interior of the car.

Interior of a 1970 Mustang wired with the Infinitybox system

Interior of a 1970 Mustang wired with the Infinitybox system

His engine looks great under the hood.

Front POWERCELL Mounted Under the Hood of a 1970 Mustang Wired with the Infinitybox System

Front POWERCELL Mounted Under the Hood of a 1970 Mustang Wired with the Infinitybox System

He relocated the battery to the trunk of the car.  He used this space for his ignition system and his front POWERCELL.  This POWERCELL location is great because it makes most of his front wiring short and easy to install.  His headlights, high-beams, turn signals, running lights, starter solenoid, ignition power, cooling fan and horn are all powered from this location.

Front POWERCELL Mounted Under the Hood of a 1970 Mustang Wired with the Infinitybox System

Front POWERCELL Mounted Under the Hood of a 1970 Mustang Wired with the Infinitybox System

His rear POWERCELL is located in the trunk.  This makes wiring his brake lights, turn signals, rear running lights, fuel pump, trunk popper and other accessories very easy.

We did some simple customization of this code to get him extra features.  He’s controlling his door locks from outputs on inMOTION.  His doors lock and unlock when he enables and disables security from his inLINK key fob.  He is also using a POWERCELL output to operate a solenoid to pop his trunk.  We programmed a button on his inLINK key fob to pop the trunk.  He also wanted an output on his rear POWERCELL to turn on with ignition.  These are all very simple changes to our system.

The finished wiring is simple and elegant.  We thank Paul L. for sending these pictures.  We’re proud to be a part of his project.

Click this link to contact our team to learn more about wiring your car or truck with our Infinitybox system.

1966 Mustang wired with the Infinitybox System

iPhone Controls this 1966 Mustang

Our customers are technology guys. They like to tinker, create and modify things. They aren’t content with things that are basic. We have been helping our customers build beyond basic cars for 10 years now. This one is no exception. Geoff Beale built a beautiful 1966 Mustang hardtop that was featured in the most recent issue of Mustang Monthly. Geoff did something very unique with the electrical system in this car. He wired it with our Infinitybox system, then paired our system with a Crestron control system. The end product is an awesome Mustang with complete control through switches and an iPhone. Read below for more details.

Geoff runs Throwback Customs. In addition to that, he is highly involved with Crestron, which builds electronic control systems for conference rooms, board rooms and schools. Geoff paired his Crestron expertise with our Infinitybox system to get a powerful electrical system for his Mustang.

The car was in pretty rough shape when Geoff purchased it. Over several years, he has shaped, sculpted and created his ideal version of the 1966 Mustang. He installed a supercharged 5 liter Coyote Mustang engine on an Art Morrison MAXG chassis. From there, he has added subtle touches to the car that you won’t see anywhere else.

1966 Mustang wired with the Infinitybox System

1966 Mustang wired with the Infinitybox System

When it came to wiring the car, he came to Infinitybox to get our 20-Circuit Kit to be used as the main body controller. This kit is powering his lighting, ignition, starter, cooling fans, fuel pump, horn and other accessories. He added an extra POWERCELL to get 10 more outputs for the added features that he has in the car. He then added our inMOTION Motor Controller to control his power windows and locks. Lastly, he added our inVIRONMENT module to control his Gen-IV unit from Vintage Air.

Because of his experience with Crestron, he wanted to use their system as the touch screen and iPhone controller for the car. Our MASTERCELL inputs are all ground switched so Geoff was able to easily connect his inputs to the outputs of his Crestron controller. All the electrical features in the car can be controlled through the Crestron touch screen or the Crestron iPhone app. Geoff has a YouTube channel full of videos showing off the integration of the two systems. Here’s an example video of him showing off the electrical features in the car.

Geoff Beale testing the Infinitybox system in his 1966 Mustang Hardtop.

This video shows off the Crestron touch screen system that he paired with our Infinitybox system.

Geoff Beale showing off the Crestron touch screen paired with his Infinitybox system in his 1966 Mustang Hardtop.

This video shows off his inVIRONMENT module in the car and how it works with his touch screen.

Controlling a Gen-IV from Vintage Air with inVIRONMENT and the Infinitybox system.

Jesse Kiser of Mustang Monthly shot a bunch a great pictures of the car. He also wrote a great article covering the history of the car, Geoff’s build and the unique features of this Mustang. You can read the entire article by clicking this link.

Congratulations to Geoff for finishing a spectacular build. We’re proud to be a part of this car.

Click this link if you want to learn how our Infinitybox system can help you wire your next restoration project.

1966 Mustang wired with the Infinitybox System

1966 Mustang wired with the Infinitybox System

Split Second Corvette built by Eddie's Rod & Custom

Split Second Corvette

There were a lot of great Corvettes at this year’s Autorama in Detroit.  A good number of them were wired with our Infinitybox system.  The Split Second built by Eddie’s Rod & Custom is a great example.  They built a stunning 1963 Corvette into a powerful Pro-Touring Machine.

The team at Eddie’s took an unconventional approach to the engine for this car.  This highly modified C2 is powered by a well-dressed 327 small-block.  This unique touch hearkens back to the car’s past but gives it the power needed to perform.

They wired the car with our 20-Circuit KitinMOTIONinLINK and inRESERVE.  They added inVIRONMENT for control of their Vintage Air.  An iPad mounted in their dash is the command center for the car.  All of the features are controlled from the iPad using our inTOUCH NET.

Corvette Online did a great article on this car and three of the other Corvettes that stood out at the 2016 Autorama in Detroit.

You can learn more about Eddie’s Rod & Custom at their website.  It is www.eddiesrodandcustom.com.

Congratulations to Eddie and his team for building a great car.  We’re proud to be a part of it.

Click here to contact our team to learn more about how you can get the most modern electrical features in your resto-mod, hot rod or Pro-Touring car.